Zenith Aircraft Builders and Flyers
Online Community of Zenith Builders and Flyers
Fuselage and Cabin Frame Joining
Taken from my build log: http://www.stol750project.info
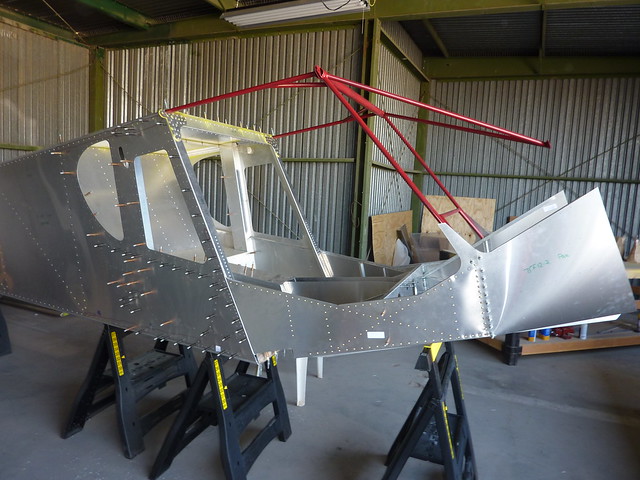
Today was a milestone day, the joining of the two fuselage parts and installation of the cabin frame.
But how did we get there? Well, we started off with some help and not just any old help, but my wife's Uncle Allen. He has years of experience of building all kinds of things, although never an airplane. We knew that between his experience and his toolbox he'd help us get it done. And so the three of us found ourselves at the hangar.....
First thing to do is join the two fuselage parts together and having an extra person definitely helped. Oh, and taking a closer look at the instructions so that the right overlaps occurred also helped :) Since all of us were involved in this effort, the only picture I have is the joined fuselage.
All of us were worried that the whole thing would tip forward but it was rock solid. Those Zenith guys know what they are doing! I put clecos in the cabin side and then set to clecoing the bottom of the rear fuselage to the gear channel. There was a bit of a gap between the two so I pushed up and Allen pushed down and it snapped together nicely.
Putting the clecos in the cabin side highlights a common problem with the photo manuals where they regularly tell you to drill holes to their final size too early. In this case, all the holes down the fuselage were size 20 already but the holes in the cabin side were size 40. You can't put a size 20 cleco in a size 40 hole and vice versa. So I had to enlarge a handful of holes on the cabin size on the bench prior to mating. I should probably be more reluctant to drill than the manual suggests but this catches me out a lot, even at this stage.
Here's the underside, showing the gear channel and rear fuselage bottom skin joined together.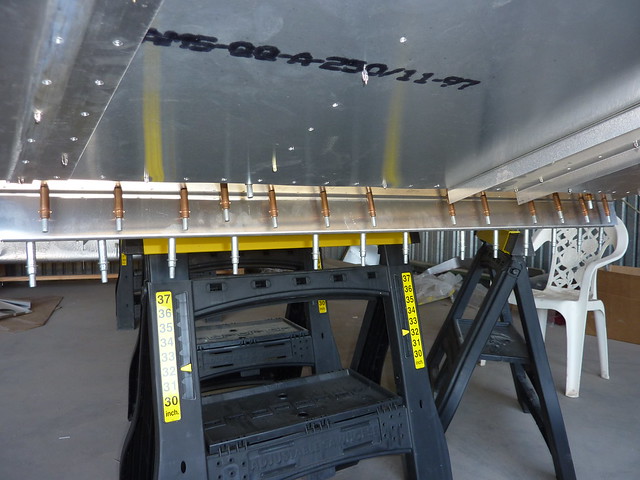
Next up is to drill into the longerons through the pre-drilled holes in the cabin side.
and install the side skin gussets. All the holes get drilled to size 20.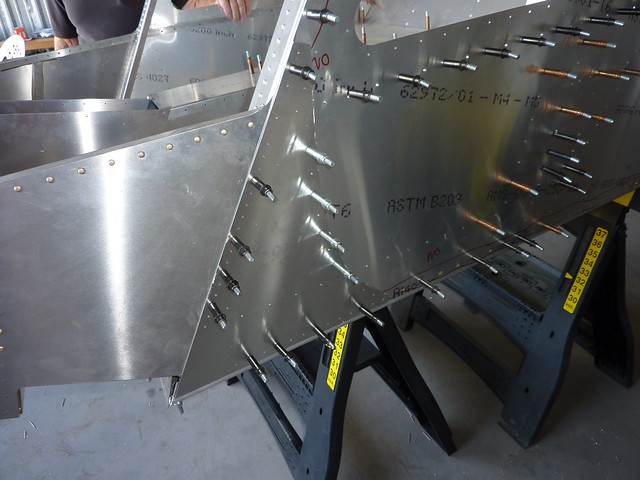
While I did this I was hoping that Allen would be coming up with a plan for how to trim the cabin frame for the proper fit. Here we are giving it a go to see how bad it is.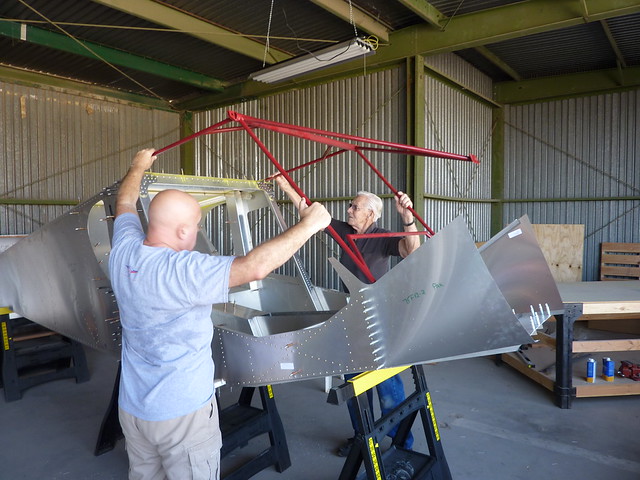
The cabin frame comes with a pre-drilled hole in each tube end that matches holes on the front fuselage, and on the top channel above the wing attach bracket. For reasons that I am sure are there only to frustrate us Zenith ship the frame with each tube end too long, and therefore it has to be cut to size. And that wouldn't be so bad, but the cut has to be made at a 15 degree angle on the top, and a 5 degree angle on the bottom.
Allen didn't get where he is today by not measuring twice and cutting once and so it was that we made 9 or 10 cuts and grindings before we got the right fit.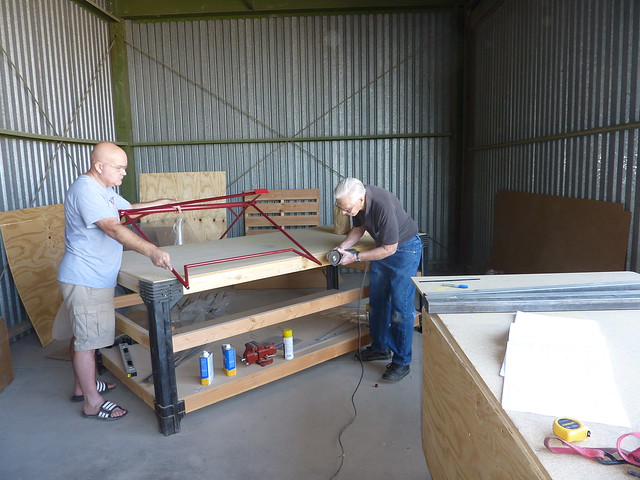
And when I say "we" I mean "he" because unlike my fear of the angle grinder he wielded it with ease and skill. He even made the angle in the cut by sight, no protractors required.
And there it is, looks darned good to me! In truth there is a little bit of filing needed on the top tubes but nothing a regular file can't handle. Here's the view from the other side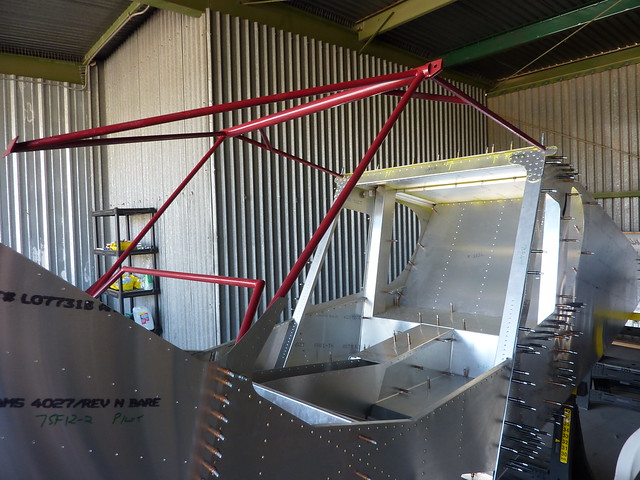
I must say that I like my choice of red for the steel parts. I have learned that I probably shouldn't paint until after the parts are ready for final install but I did in this case and that is that.
Of course nothing lasts forever and this will soon need to be dismantled for deburring. Before that I need to mark and drill the position for the seat base, though. After that we might be able to reassemble and rivet but before that I need to make sure that the interior parts can be taken in and out as I need.
Comment
-
Comment by Danal Estes on April 10, 2013 at 7:36am
-
Nice post, great writeup, great photos.
New from Zenith:
Classified listing for buying or selling your Zenith building or flying related stuff...
Custom Instrument Panels
for your Zenith:
Custom instrument panels are now available directly from Zenith Aircraft Company exclusively for Zenith builders and owners. Pre-cut panel, Dynon and Garmin avionics, and more.
Zenith Homecoming Tee:
Flying On Your Own Wings:
A Complete Guide to Understanding Light Airplane Design, by Chris Heintz
Builder & Pilot Supplies:
Pro Builder Assistance:
Transition training:
Aircraft Spruce & Specialty for all your building and pilot supplies!
How to videos from HomebuiltHELP.com
Developed specifically for Zenith builders (by a builder) these videos on DVD are a great help in building your own kit plane by providing practical hands-on construction information. Visit HomebuiltHelp.com for the latest DVD titles.
© 2024 Created by Zenith.Aero.
Powered by
![]()
You need to be a member of Zenith Aircraft Builders and Flyers to add comments!
Join Zenith Aircraft Builders and Flyers